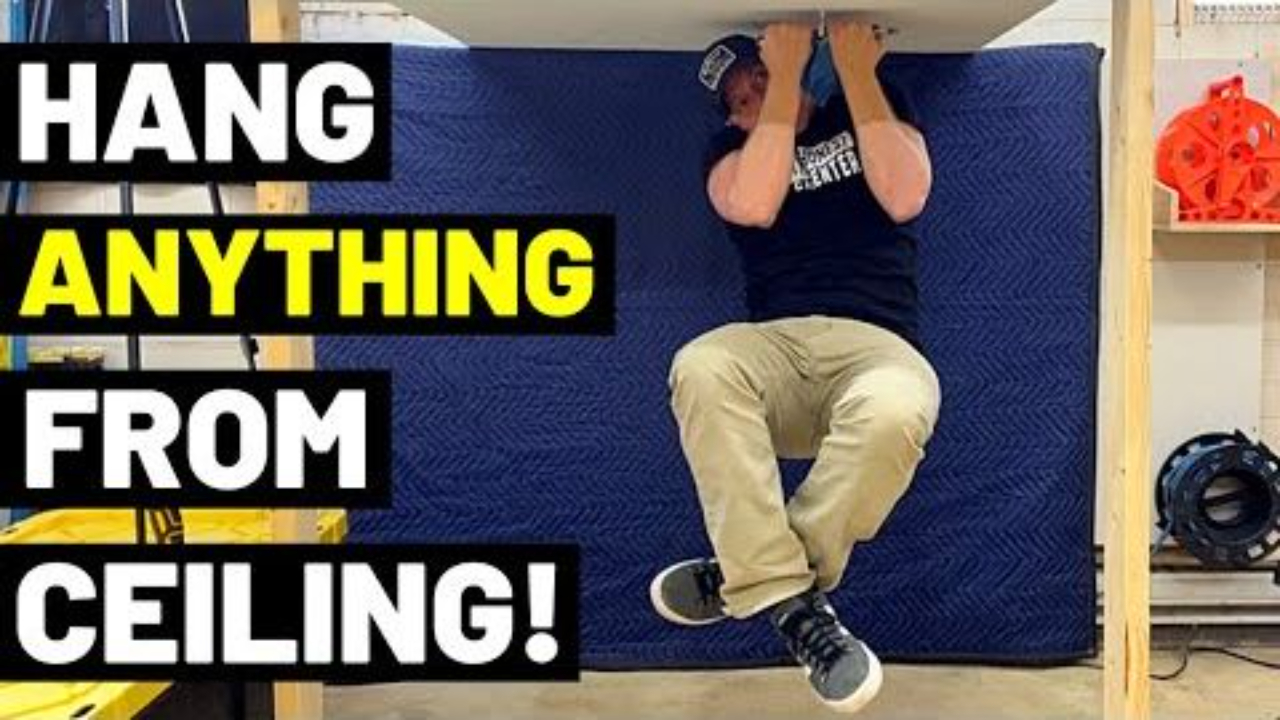
5 Ways To Hang ANYTHING From The Ceiling!
Sep 16, 2024I’ve been asked a hundred times how you can best hang things from the ceiling of a room—including heavier things. This article and video from The Honest Carpenter will explain the 5 BEST WAYS to tackle ceiling mounting, with each way addressing increasingly heavier loads.
Tool/Material List:
- Toggler 3/16" Anchor Bolts 10 pc
- Toggler 1/4" Anchor Bolts 20 pc
- 2-1/2" Eye Ring Screws
- 2-1/2" Screw Hooks
- 3/8"-16 Threaded Rod
- Dewalt 20v Drill + Driver Combo
- Stanley 25' Powerlock Tape Measure
(These are Amazon affiliate links. When you shop through these links, we receive a small commission at NO EXTRA CHARGE TO YOU. See our Disclosure Page for more info.)


When it comes to attaching things to the ceiling, I really don’t like taking chances. The idea of something dropping onto someone’s head is too scary. So, I don’t use any plastic sleeve anchors, or even the self-drilling plastic anchors that I like for walls. These anchors basically rely on grip pressure within the drywall itself, and drywall is a very soft, powdery material that’s prone to crumbling.
Never use sleeve or expansion anchors!
All of the weight when you’re hanging from the ceiling is “tensional force,” which is the stress of two objects pulling away from each other. And that internal grip is never enough to rely on for really any weight over a pound when it’s hanging like this. Plus, these types of anchors don’t work at all in plaster walls, because plaster is very prone to fracturing, and it’s usually backed by irregular lath. So, I won’t use ever use sleeve or expansion type anchors in the ceiling no matter what’s made of. Instead, if I’m mounting anything over a couple pounds, I may go with our first option: Using a Toggle Bolt.
Option 1: Toggle Belts

Toggle Belts are great for mounting anything under 10lbs.
Toggle bolts are the anchors that have the little spring-out wings. And newer really convenient ones come with snap-off plastic inserts to make installation easier. To install them, you drill or punch a hole through the ceiling where you want to suspend something. Then you collapse the wings, or tilt the toggle, and push it through the hole. The wings spring open on the other side, or the toggle will tilt, and you can tighten it in place by turning the supplied bolt through it. The reason I like them is that you get that suspending effect that comes from having open wings clamping from the backside of the ceiling. It’s much harder to pull them THROUGH the drywall that way.
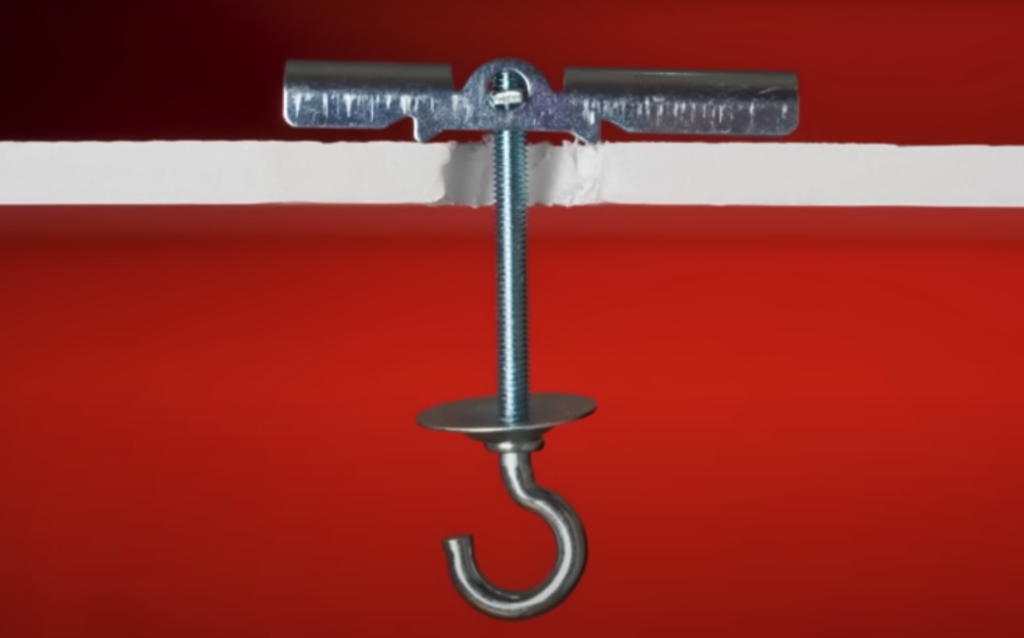
Toggle bolts have open wings that clamp from the backside of the ceiling making it much harder for them to pull through drywall.
And the great thing is, you can put them really wherever you want them, because they create their own support. But you have to be sure not to overload them! I don’t like to get anywhere near the weight limits suggested on packages, which are often talking about wall-mounting loads. Again, the tensional stress on toggles in the ceiling is much greater, and you want to stay far away from the failure point. I personally wouldn’t go beyond 10 lbs. with them. If you want to create more reliable strength for hanging something heavier, use option number 2—Hang from a Joist.
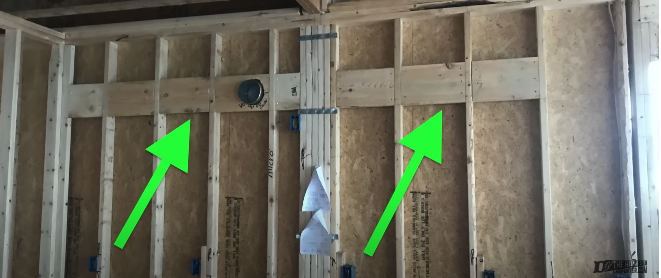
Option 2: Joists
Joists in the ceiling are just like studs in the wall, except that they run horizontal and span open distances above and below us. They’re also typically wider than studs—usually 6-12”

If you want to create more reliable strength for hanging something heavier, hang from a Joist.
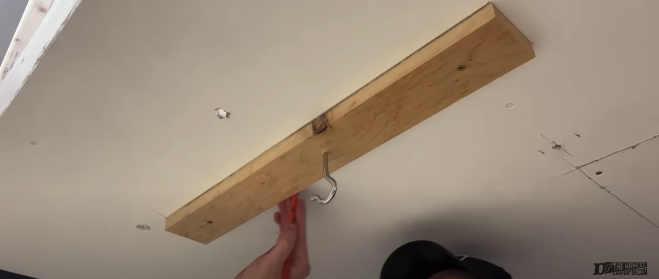
Joists are the actual framing of the house, and they’re very strong. You can hang really heavy weight weights from a ceiling joist with the right hardware—over 100 lbs. in many cases. You just need to locate the joists first... I tend to do this by knocking with my knuckles, or using magnets to locate fastener heads. Or, if I have one on hand, I will just use a stud finder. And, when I find a joist, before I mount to it, I make sure to bracket the joist to find the center, because that’s where I hang from. I did a whole video on that so check it out—it’s really important here. You don’t want your fastener catching the edge of the joist, you want it in the center.
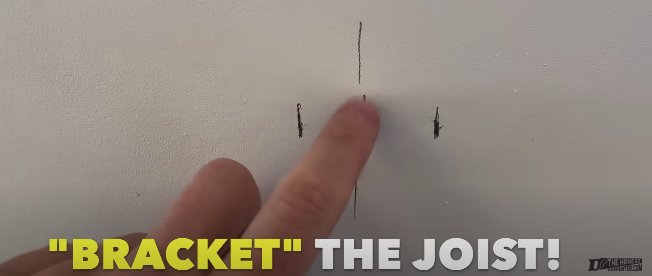
Find the joist by knocking, using magnets to locate a faster head, or by using a stud finder. Then bracket the joint to find the center.But with something like a screw eye bolt, or screw hook, you can just pre-drill at your joist location, using a drill bit slightly narrower than your screw. Then, turn your threaded hardware into the hole, clear to the last thread, and hang things from it.

Mounting a screw eye bolt, or screw hook into joists is a great and reliable way to hang things.
I do lots and lots of ceiling mounting this way, because it’s very reliable, and the ceiling typically has joists typically spaced every 16”. So, you can often find one fairly close to your desired hanging location. But, if a joist still isn’t right where you want it, and you need to hang something fairly heavy in a really particular spot, you can move on to option #3: Add Ceiling Blocking.
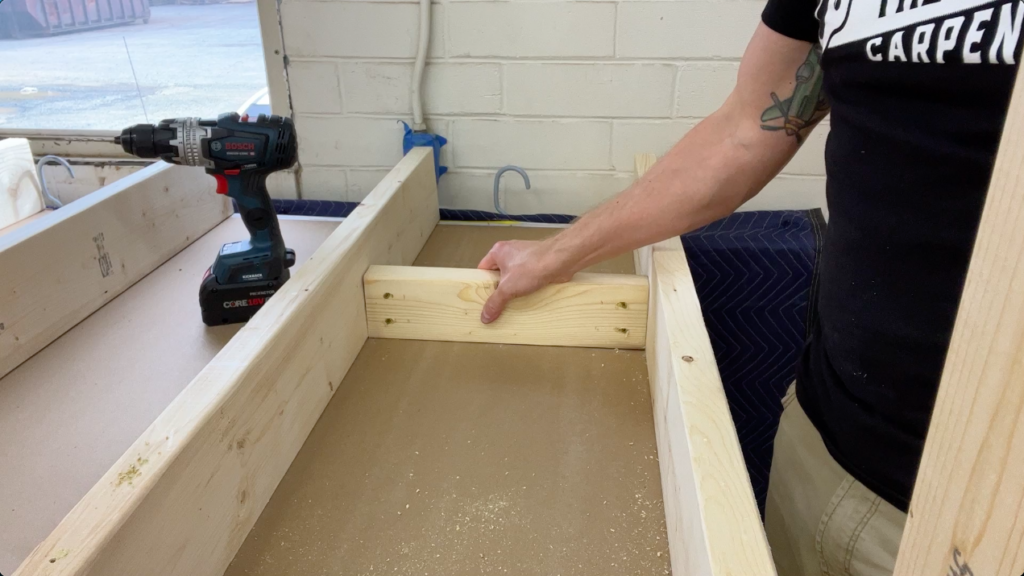
Option 3: Add Ceiling Blocking
Blocking is basically short framing pieces that bridge the space horizontally between longer framing members. Your house is actually full of blocking—you’re just not likely to find it in the right place by luck. But, if you’re careful, you can add more wherever you want it.
Blocking is basically short framing pieces that bridge the space horizontally between longer framing members. Your house is full of them.
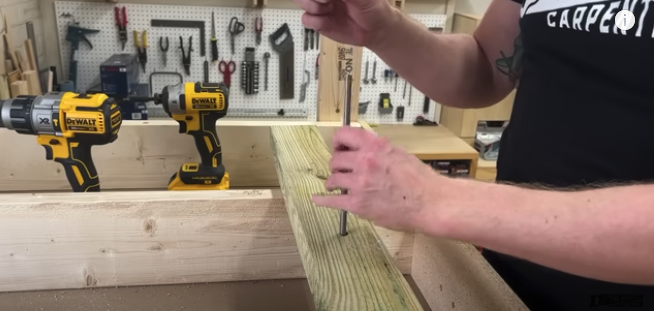
This is easiest to do if the ceiling actually has an open attic space behind it. If that’s the case, you can look down at the back of the drywall surface from above, even if you have to sweep blown insulation aside. My mock-up ceiling here is just 2x6s, but it simulates looking down into the joist bays from above. So, I can poke a hole right where I want to mount, and find it from above. Then I can measure the space between joists, and cut a block to that length. From here, you’ve got two options. The first is that you can just lay the block down flat inside, and attach it over the hole by end screwing through adjacent framing to trap it in place. If end-screwing is not an option for some reason, you can pre-drill holes at a steep angle on both ends of the block, push it down to the back of the drywall or plaster, and drive toenail screws through the block into the adjacent joists, maybe 2 or 3 per side. By installing it flat like this, you give yourself a really wide field of lumber to hit. And because the span is so short, it can hold quite a bit of weight. Like, possibly your whole body weight. And, to make it EVEN stronger than that, you can also turn your blocking up on edge, and install in a similar way. Standing it up like this gives it crazy maximum strength, even if it presents a narrower edge to hit from below.
Laying your block flat gives a wide field of lumber to hit, but turning it on edge like this presents a narrower edge to hit from below but provides maximum strength. Things are always stronger in their wider dimension—that’s why joists are all standing up on edge, rather than lying flat. I’m going to cover this topic more in the future, because it’s the underpinning of how we build literally every structure in the world. But that’s for later videos and articles. Now, if you can’t get to the space from above, like through in an attic, you can still manage this install. Just cut a decent-sized hole in your ceiling, and do the installation from below.

If you can't get to the space from above, like the attic, you can still manage a block install but cutting into the ceiling. I like to use an oscillating tool to make the cuts because it’s really clean and fast. You just want to open up a space from the mid-point of one joist, to the mid-point of another. That way you’ll be able to reattach your drywall patch in place. It’s more cramped working like this, and, yes, you do have to fix drywall afterwards. But this is how you still can add strong, custom blocking between occupied floors.
Option 4: Surface Cleat
In this case, you just cut a flat piece of wood, maybe a decorative hardwood, find two joists near your mounting location, and screw the cleat against the drywall into the joists. Now you can put a hanger somewhere in the span of the cleat, and you can even run your cleat diagonally as long as you’re bridging too joists, so the cleat is supported at both ends. Just remember that this is not as strong as blocking. The weight value is probably somewhere between blocking and toggles, based on the wood and fasteners you use. And, yes, you’ll have this chunky block hanging down into the room. You can caulk or paint it in, but it might be an eyesore, especially if you use 2x4. An alternative version of this is option number 4: Add a Surface Cleat.
Surface cleats are an alternative to ceiling blocking (but not as pretty nor as strong). A trick to hide it a little better, though, is to trace out its exact location with a pencil, then notch out the drywall for this shape, and recess the wooden piece into the drywall layer. You can caulk around it, paint it, and get a slightly more flush appearance this way. That’s an old mounting trick. And finally, option number 5 is convoluted, and I’ve only seen it used a couple times, but I’ll add it here in case it helps somebody. You can also HANG FROM A THREADED ROD.
Option 5: Threaded Rod
In this example, if you can get to the attic but adding blocking will be difficult, you can instead add a 2x4 plate across the tops of the exposed joists. Then you can bore a hole through it, and feed ¼” or 3/8” threaded rod down through the joist bay, through the drywall, and into the room.
Adding a threaded rod is rarely seen, a little more convoluted, but may be helpful in a weird situation. Now, you can add washers and bolts at the top for holding power, and then hang stuff from from washers and bolts at the bottom. I’ve seen contractors who had to hang heavy false beams do it this way by encasing a suspended 2x4 inside, and attaching to it. Again, it’s sort of convoluted. But the concept of suspending from threaded rod is something you see a lot in commercial construction with steel trusses, and it just may help you in a weird situation.
Wrap-Up
At any rate, I hope that gives you a better idea of how to safely hang stuff from the ceiling. Thanks for reading the article and watching the video! Let me know what you think of these methods in the comments section of our YouTube Channel, and if you have other ways, let me hear that as well. Sign up for our newsletter to get more advice, insights, stories and more!
Another Helpful THC Post

Here's a link to our article on testing for wood rot.
If you have any questions, or if you have a suggestion for a subject of a future blog post, please go to our Contact page. Thanks!!
ACCESS MY FREE GUIDE:
The Ultimate Carpentry Checklist
and Glossary!
- Comprehensive Checklist: Quick reference to essential tools, materials, and concepts, color-coded for easy navigation.
- Detailed Visual Glossary: Visual aids to help you recognize and understand each tool and term.
- Expert Guidance: Curated insights from over two decades of carpentry experience.


