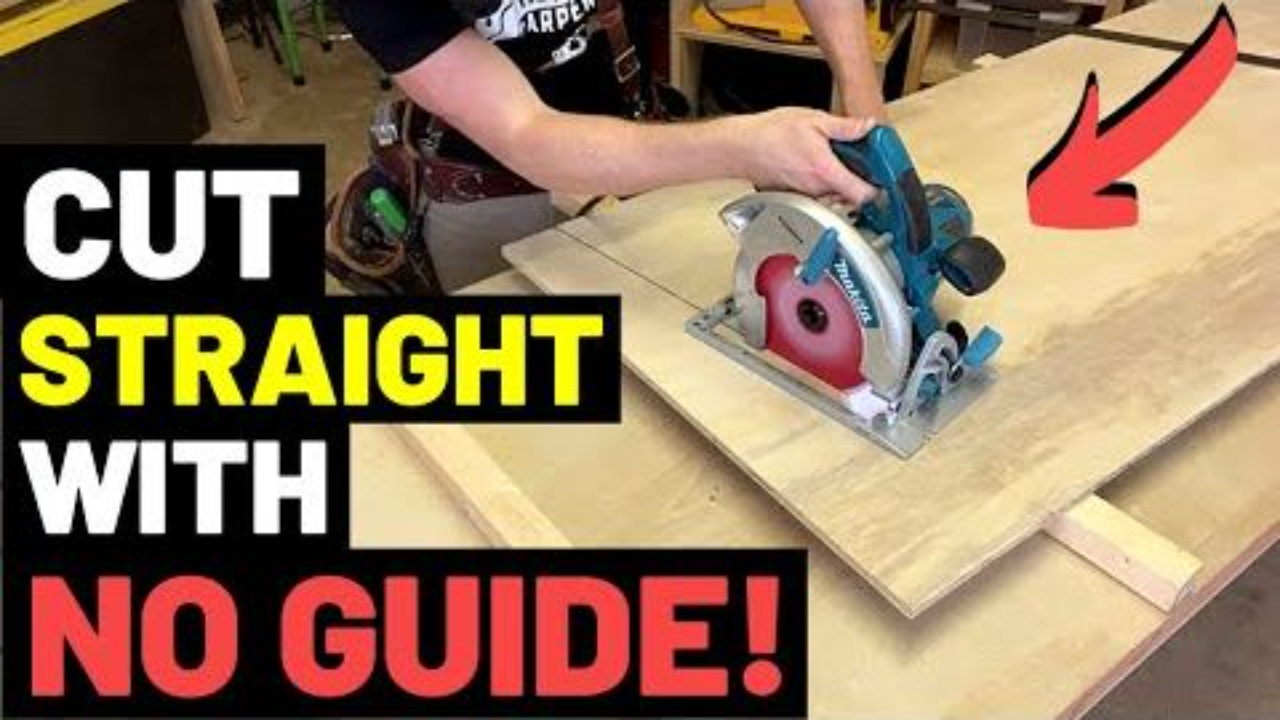
How To CUT STRAIGHT With NO GUIDE
Sep 16, 2024How do professionals make straight circular saw cuts, on the job site, without using a guide?
I get asked this question a lot. People see me cutting freehand on the show, and they say, how do you do that?
Obviously, I could just write this off by saying, “Oh, it just takes a ton of practice. You have to do it thousands of times.” And, to some degree, I guess that’s true. But that doesn’t help, or encourage, the average DIYer who’s just getting comfortable with tools.
And on top of that, I do think there are some tips and tricks that make a huge difference when learning to cut freehand. Some of them are mistakes to avoid, and others technical conundrums that have to be addressed.
So, in this article and video, I’m going to explain in depth how to cut freehand. I’m going to break it down in minute detail, and demonstrate a few different types of cuts.
Circular saws are powerful tools with very sharp blades. Please follow all safety instructions as they are described in the manufacturer's guidelines for your saw.
But before we get started, I have to remind you: USING A CIRCULAR SAW IS DANGEROUS!
They’re powerful tools with very sharp blades. Consequences here are fast and unforgiving. You’re using one at your own risk.
So, please, follow all safety instructions for your saw. Don’t use it unsupervised if you’re not experienced. And never use it against manufacturer guidelines.
I did a video on 11 circular saw mistakes that I think you should watch if you’re new to the saw. But, ultimately, you’re responsible for your own safety. So, proceed with caution.
Alright, warning has been delivered. This article and video from The Honest Carpenter will show you some tips on how to cut straight freehand with a circular saw.Tools:
Makita Magnesium Circ Saw 7-1/4"
Skilsaw Lightweight Worm 7-1/4"
Skilsaw Sidewinder 7-1/4" (Best Cost/Value)
Dewalt 20V Max Cordless 6-1/2" (Tool Only)
Makita 18v LXT Cordless 6-1/2" (Tool Only)
Diablo 7-1/4" Circular Saw Blade


I. SET UP: Blades, Boards, & Support Blocks
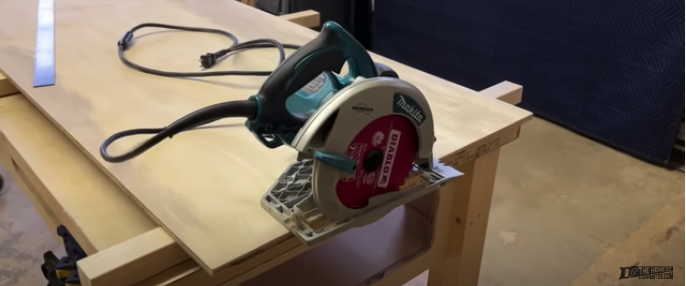
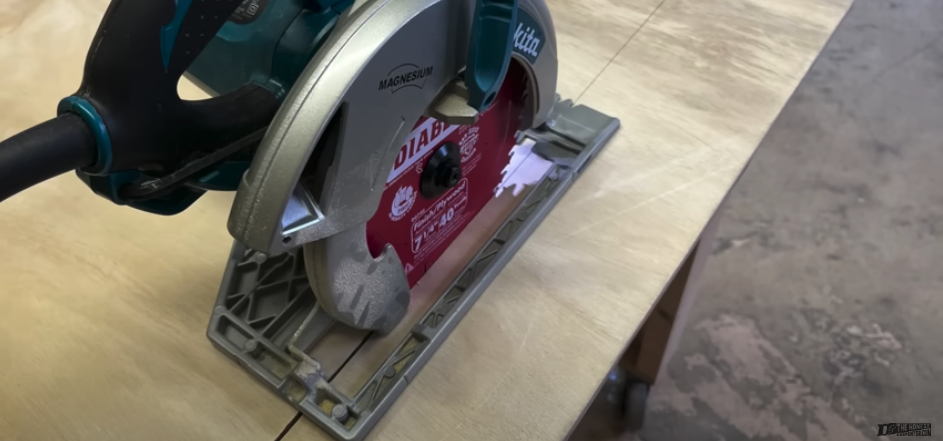
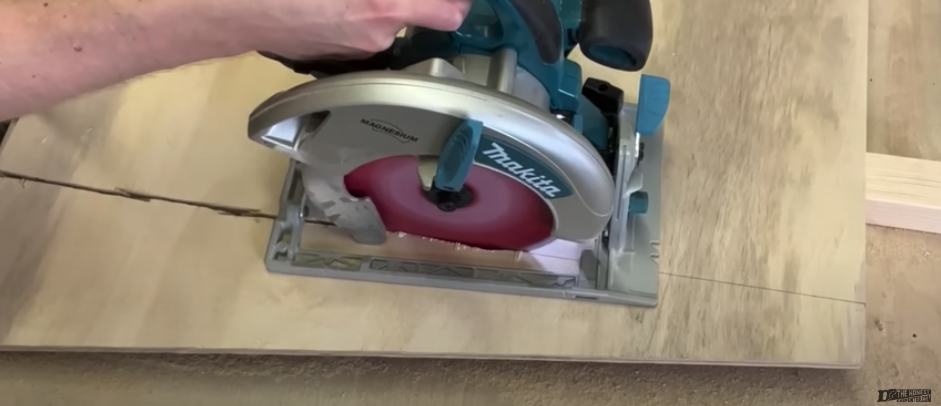
Okay, first thing to be addressed here—I’m using a corded sidewinder makita with a 7-1/4” blade. This saw has the blade to the right. Some people use worm-drive saws, like my skilsaw, which typically have the blade to the left.
This makes how you view the cut line different for each saw. And this is very important, because, as we’ll discuss, seeing the cut line is a huge part of cutting straight.
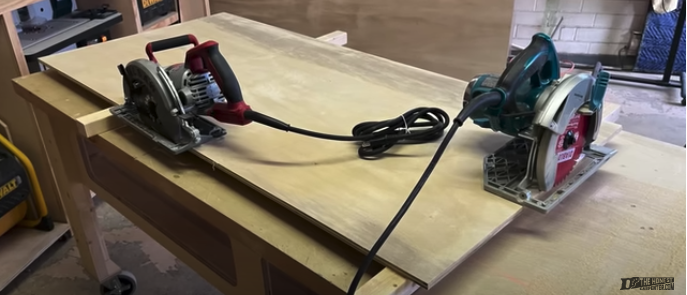
Skilsaw (pictured here on the left and has the blade on left) and a Sidewinder Makita (pictured on the right and has the blade on right). Being able to view the cut line is a huge part of cutting straight.
I’ll do a video later on the differences between these two tools. It’s a raging debate in construction. But for today, I’m focusing on my right blade sidewinder because it’s the one I prefer. You can adapt a lot of these techniques to other saws though without much difficulty.
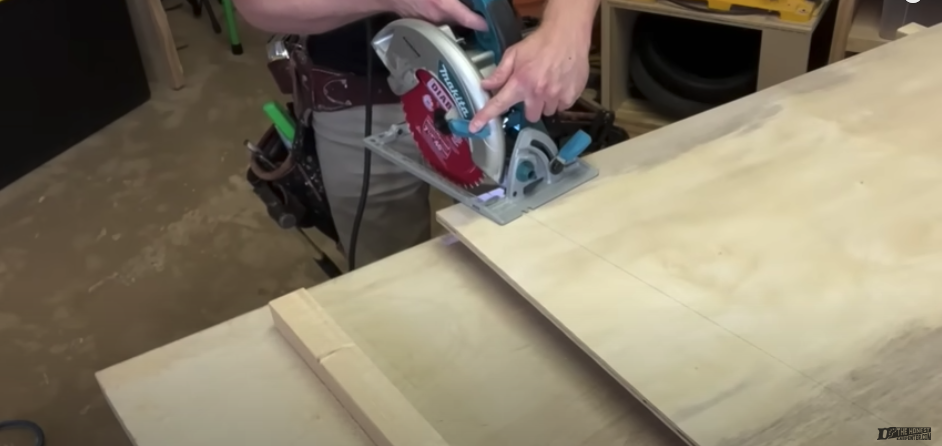
Also, I’m going to focus on cutting wider boards, because this is where we do a lot of our freehand cutting. I already did a video on using a speed square as a guide to cut narrow boards, something that I think DIYers should employ as much as possible.
Freehand cutting takes a lot of stability whether cutting on a work table or on the floor.
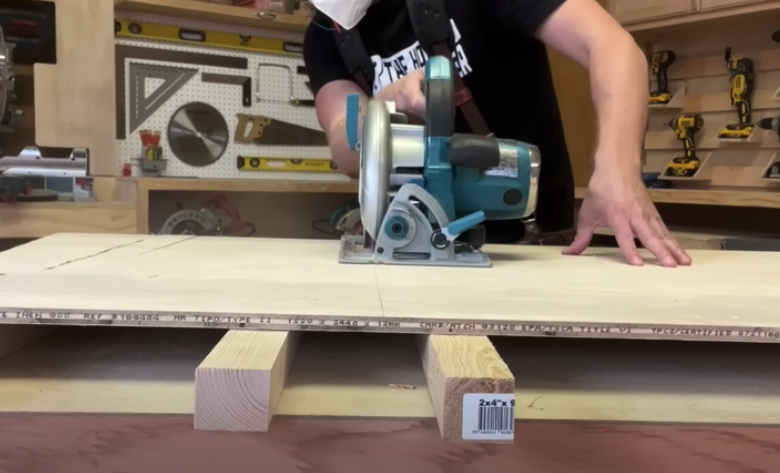
The other thing to keep in mind that that freehand cutting takes a lot of stability. I’m cutting on my work table. And, as always, I want my boards propped up to keep the saw from cutting the table top.
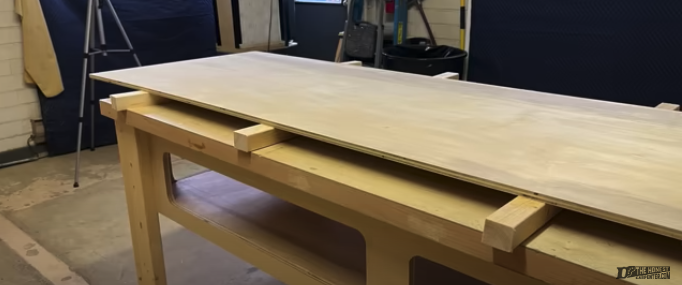
I’m using ripped-down 2x4’s, about 3’ long. I lay them down on their milled face so they’re all flat, and level at 1-1/2”. You don’t want high points.
And, if you’re cutting a really big sheet, you probably want to just go ahead and move down to the floor. This way you stand on your board as you cut it, and you’re not trying to reach across a 4’ board. You can move narrower pieces back up to a table afterwards.
And the last thing to consider for stability is how far apart your support blocks are placed. I tend to use 3 or 4 for longer boards. I cluster two of them on either side of my cut line. Then, outer ones will catch or hold extended ends, if I think the cut needs it.

I tend to use 3 or 4 support blocks. 2 clustered on either side of the cut line and 1 or 2 on the outer edge of the board.
Again, the key to safety is nothing moving unexpectedly. You want support of the saw, and support for both sides of the cut. I’ll show more of that as we go along.
So, set-up is basically taken care of here. The next most important thing, as discussed, is establishing a straight cut line. You cannot cut freehand effectively without a line to follow.
II. ESTABLISHING A CUT LINE
I use metal straight edges to draw mine. This is basically just a 3’ steel ruler. You can also use this to guide a cut—but that’s a topic for another time.
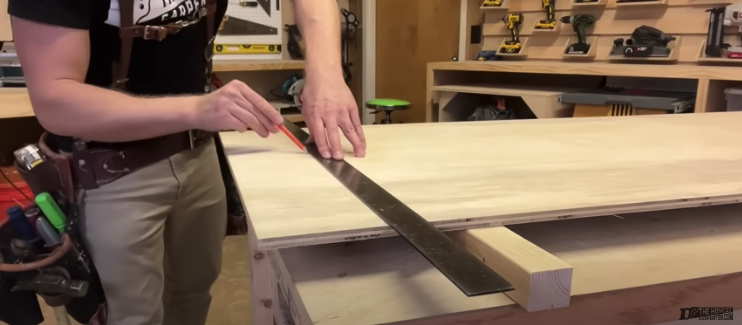
Use a sharp pencil to draw a fine line between the two crow's foot marks, making the line straight and exactly where you want.
To use it here, I first plot two marks by pulling from a square end of the board. This gives me a high and low reference point at either end of the cut. Then, I simply use the straight edge to connect the two.
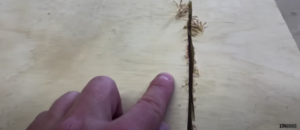
Also, a sharp pencil is extremely important here. A fine line makes for a finer cut. Here, I’ve extended my cut line through my crow’s foot marks. The line is perfectly straight, and I know it’s where I want it.
Now, we come to the discussion of the kerf—which side of the line do we want to cut on. I did one of my most important videos on this subject. So, please, watch that if you’re confused.
For clean cuts, I usually want the cut line to be on the right side of my saw blade.
But for clean cuts, I usually want the cut line to be on the right side of my saw blade. I can track it easier here. Again, this might differ by saw, but this is where I feel most comfortable cutting.
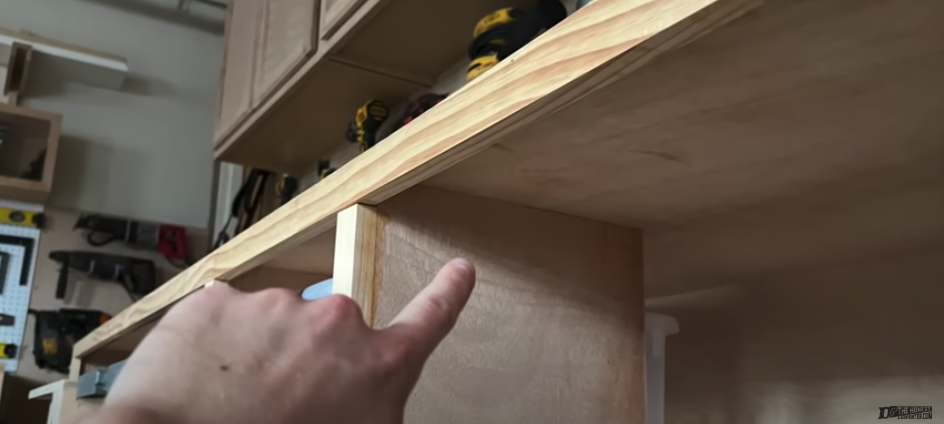
I can see my cut line through this little window over the pommel (see where my finger is touching the line in the pic below). Or, I can lean my head over my right shoulder, and sight down the far side of the blade. Both get more comfortable with practice.
But the important thing to know here is that you have to keep eye contact with your cut line the entire time you are cutting. If you look away for an instant, things can go wrong. So, know your sight windows in advance.
Use the window over the pommel to see the cut line or lean your head over your right shoulder, and sight down the far side of the blade. The little notch in front is not accurate enough to guide precise cuts, so you have to keep your eye where the blade meets the wood.
II. STARTING THE CUT
Now, starting the cut is one of the most difficult parts, and also the most important. If you don’t start cutting straight, you won’t be able to get on track. The cut will be messed up right away. So, I spend a lot of time on my initial line-up.
I set the front of my sole plate on the near edge of the board, and I bring the point of my blade tooth right up to my line. You want to try to split that pencil line in half with your cut.
Bring the point of the blade tooth right up to the line.
I then sight from the back of my saw, and try to make sure that my blade is in line with the cut path. The straight line of the saw blade should look like an extension of the pencil line. This can be tricky, but you want to get as close as possible from the beginning.
Now I grab the pommel, and back the saw off just about 1/16” or 1/8”. You don’t want the blade in contact with the board at startup, you just want it close.
Also, make sure that the saw isn’t angled upward—you don’t want it hanging down at the back. You want it to slide flush onto the cut surface.
All of these things can be micro-corrected as you’re starting—and you’ll have to do that. But, getting them as close to perfect from the beginning will make that much easier, and keep the first part of the cut clean.
So, with the blade near the board, I pull the trigger, and let the saw spin all the way up to full speed. Then, slowly, I begin to drive forward.
With the blade near the board and the saw flush to the surface, pull the trigger and let the saw spin to full speed.
All I’m looking to do at first is make my blade tooth split the cut line in half, ON THE SIDE THAT I WANT THE BLADE TO CUT!
Notice that I might make small shifts here to get the notch to line up. This is the first tracking I do, and it’s very, very important. I won’t drive forward anymore until it looks like I’m right on target. Then, I only commit to about a half-inch after that.
Assessing margin of error.
Here, I’ve stopped a cut so you can see my first margin of error. This start isn’t perfect, but it’s not that bad either. I’ve split my line, I’m on the appropriate side, and I’m not showing too much wobble. But I’m still not out of the woods!
What I really want to focus on now is basically getting the full blade into the lumber on my line. Until the blade is all the way in, and the cut will feel loose, like it wants to slide a little.
This is normal. The blade still doesn’t have much support from the wood itself. So, you have to provide all that stability for the first, about, 5”-6”.
You don’t want wiggle later on, but in the beginning it’s to be more expected.
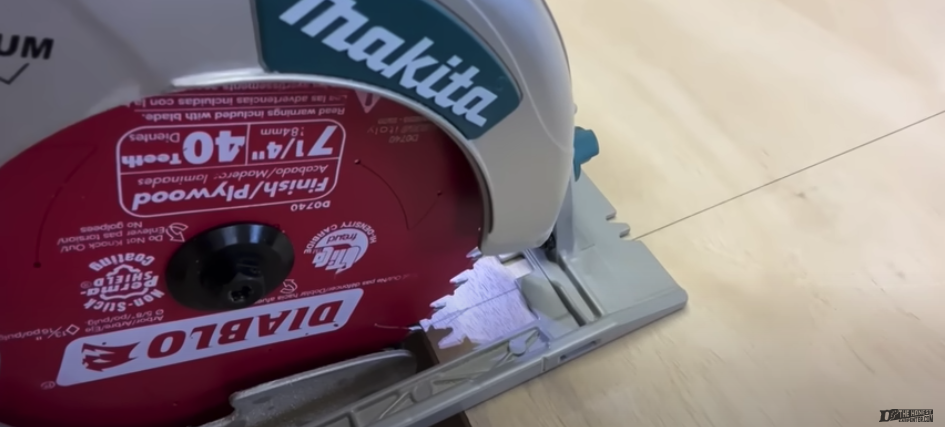
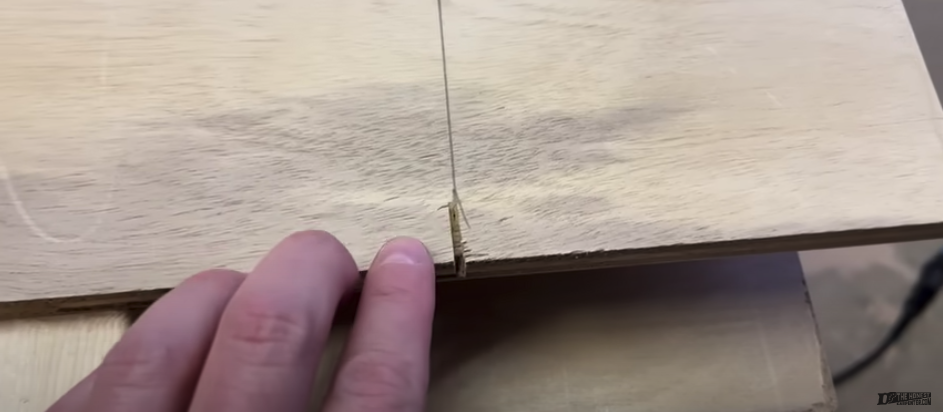
Also, If I’m going to back the saw up to readjust, it’s mostly going to happen here in the beginning as well. I try not to overdo this because it can cause blow-out and splintering, as you can see around the kerf below. But small backups may be necessary now.
Backing up the saw too much at the beginning can cause blow-out and splintering.
So, I’m tracking with my eye very closely, and cutting very slowly with both hands on the saw.
The main reason for keeping my free hand on the pommel is to create enough steady forward pressure to lift the blade guard smoothly. This can sometimes jostle the cut early on, so you want to make sure to keep things stable until the guard is up.
On square cuts, I usually let it lift itself. In other cases, I’ll lift it by hand, but we’ll get to that.
III. CONTINUING THE CUT AFTER 6" - WHY THINGS STABILIZE & BECOME EASIER
Now, once you’ve driven in about 6”, things begin to change a little bit. They stabilize, and it gets easier to make the cut. Why does this happen?
It’s because circular saw blades inherently want to cut in a straight line. They don’t want to deviate or waver—they just want to keep going straight forward. And this occurs because circular saw blades have a lot of surface area.
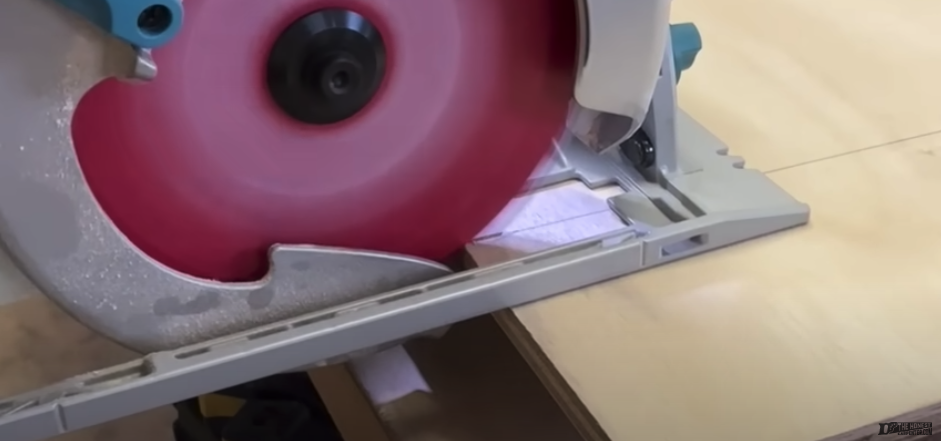
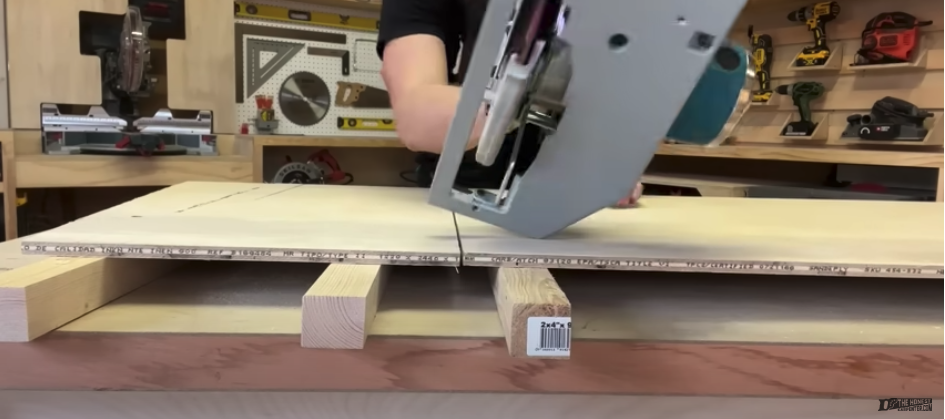
Just look—you normally want your saw blade extending ¼” beyond your board. This means that all this blade above that point is basically trapped inside the board!

When I hold some cut-off scrap behind the exposed blade, you can see how much of that blade is encased within the walls of the cut.
The saw blade creates its own path, or kerf. The blade itself is slightly narrower than the kerf, because the blade teeth are wider than the body. But the point is, it's sitting in this little channel it’s made, and it doesn’t want to get out of that channel because the blade is rigid, and it’s going to have to fight to create a new path.
When you twist it, the blade is pushing out against the walls holding it in. The teeth have to dig at these surfaces and try to relieve pressure, and the tool doesn’t want to do that.
When trying to push the blade out of its channel, it fights creating a new path.
Skinnier blades, like jigsaws, can make tight curves because they don’t have much surface area in the wood. But turning a circular saw blade in a cut is like trying to reverse a tractor trailer in a tight alley. The blade is just too long.
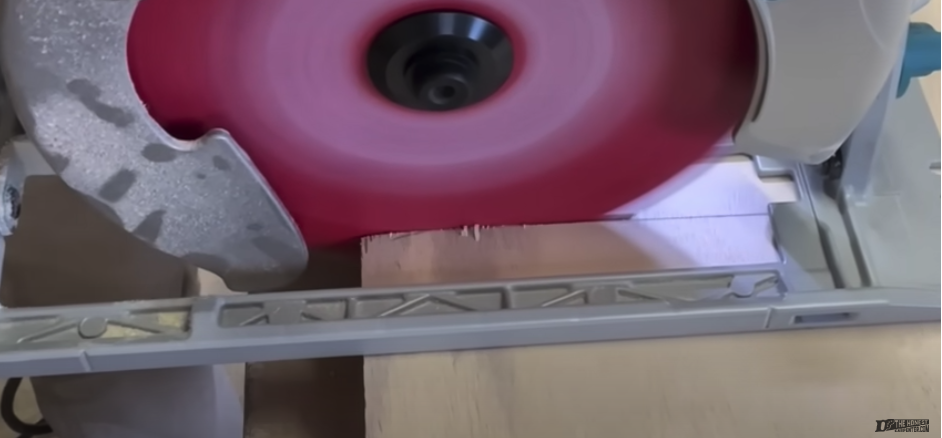
The extra pressure on the blade bogs down the motor. It starts to whine and slow down, and you can feel the saw fighting you. There’s too much resistance, and the saw will rip at the walls around it. Just look at the aftermath of a twisted cut:
The aftermath of a twisted cut.
But when the blade gets on a fixed course, it’s going to want to stay on that fixed course all the way through the board, because there’s no resistance. That’s the easiest path forward.
This phenomenon is at the heart of freehand cutting. Because when you learn to line up early, and start on the right track, it becomes immeasurably easier to stay on the right track.

When the blade gets on a fixed course, it wants to stay on that course all the way through the board because there's no resistance.
In fact, when I’m about a foot in, I’ll often take my free hand off the pommel, and place it on board to make sure that it doesn’t move, because board movement is very dangerous.
But here, with my blade on track, I just watch it closely from behind and above, and make the tiny micro-corrections that are required to prevent it going off-track.
Once you are locked in the cut, watch closely from behind and above, make the tiny micro-corrections and finish the cut.
At this point, I also don’t really stop for much. You’re locked in on the cut—as long as you can reach the full distance, you’re better off going ahead and finishing it. When you stop and start cuts, it actually gives you chances to get out of line again, and lose your equilibrium.
But it happens sometimes! You might have to readjust because something’s in the way, or your hand’s tired. So, here are quick tips for doing it cleanly.
IV. TIPS IF YOU HAVE TO STOP THE SAW MID-CUT
DON'T MOVE THE SAW! Come to a stopping point, take your finger off the trigger, and let it wind all the way down. Keep both hands on it until it’s done and don’t jostle it. A saw slowing down can very easily kick out.
When it’s fully stopped, take your hands off without budging it and leave it exactly where it is. It’s perfectly lined up in the kerf, and one bump can lightly twist it.
When it’s time to cut again, carefully put your hands on the grip. Now, before starting up, back it up just like 1/16” of an inch, a tiny bit. You don’t ever want to start a saw up with any contact—again, it can kick.
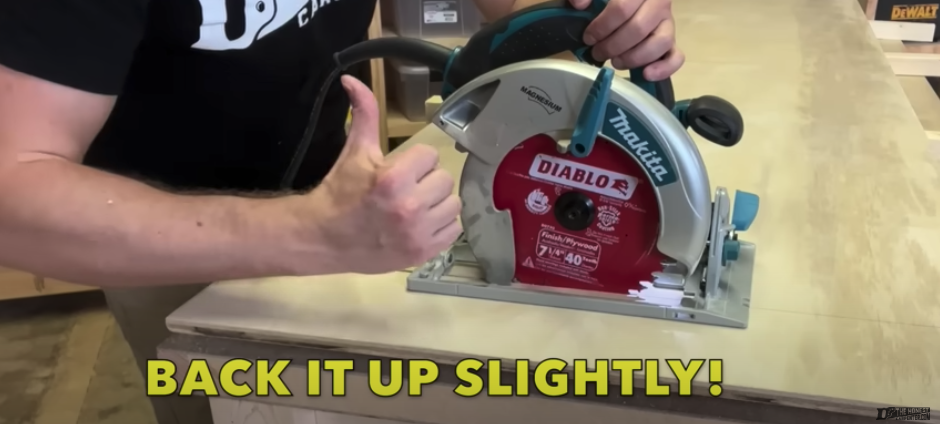
You never want to start a saw up with any contact.
Now, firmly braced, hit the trigger and let it spin all the way up. Try to get the front tooth edge to hit that exact same cut line that it already made. You’ll see if it’s slightly off, it’ll look like a microscopic notch. That’s not what you want!
You want to find, and stay on your old cut line. Keep splitting that pencil mark in half. As the saw drives forward, you’ll feel it stabilizing again from making contact with fresh wood.
V. FINISHING THE CUT
To finish the cut, pass the full length of the blade all the way through the board until it’s out, then lift the saw away before the sole plate falls off the edge.
Pass the full length of the blade all the way through the board until it’s out, then lift the saw away before the sole plate falls off the edge.
It’s easy to jostle here, especially if you’re reaching. I try to avoid jostling (and creating a notch at the end) by driving forward until I’m all the way clear.
That’s how you make a straight line cut freehand. Keep in mind, it’ll never be completely perfect because of those tiny, tiny micro-adjustments. Everything shows up on a board. The edge is very unforgiving.
This is why you don’t want to cut freehand on projects where perfect lines matter, like a lot of cabinet stuff. You want to use a saw guide or a straight edge for those projects, and I’ll do a whole video on that.
But, for shop grade stuff, or some exterior things, this line is straight enough that people won’t notice it. I cut much of the stuff around me in the shop freehand. And I often hide those rough cuts in blind joints, so they’re not as obvious. That’s a little bit of strategy.
I cut much of the stuff in the shop freehand and hide the rough cuts in blind joints.
But those are the main techniques for cutting free hand.
VI. RECAP
Use sharp pencil lines, start on track, and go slow until the blade is all the way in. Then, always watch your cut line, let the saw stay on its straight course, and don’t stop or readjust too much unless you have to. Those are the essentials!
VII. OTHER IMPORTANT THINGS TO CONSIDER
And, here are a few other important things to consider...
Don’t back the saw up too much in the middle of the cut. People do this all the time. They start to get a little off course, then pull the saw back like an inch. This creates two big problems!
One, because you got that far off course, you’re going to have a big notch at the front. But also, when you pulled it back so far, you created an opposite notch at the other end. Remember, the blade is a long straight line. And it can cut at the front AND the back!

Don't back up the saw too much in the middle of a cut. You can make a big notch at the front AND the back.
Too much of this on a board just makes a horrible line. It looks like barbed wire. You’ll get double bad cut marks if you pull the saw back a lot, and tons of blowout. Instead, just take it slow. Only make tiny adjustments to keep the front of the blade on track.
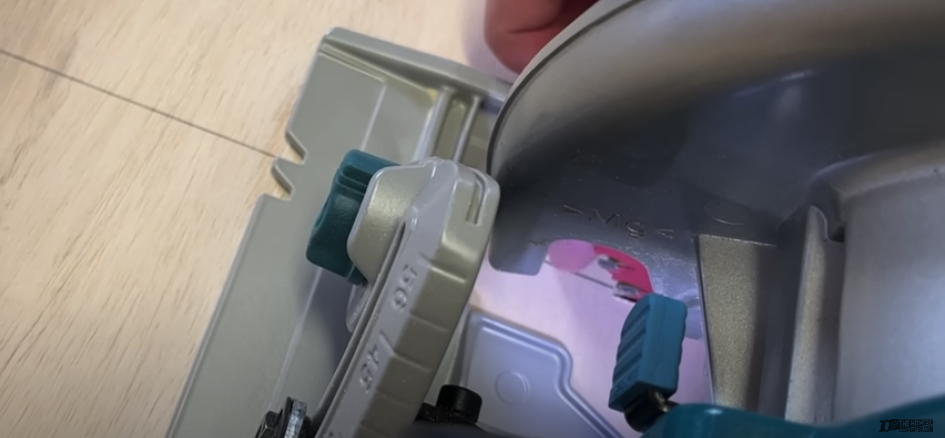
Also, in some instances, I will pull up the guard at the start of a cut to get it out of the way. This can vary by saw, but my Makita guard sometimes gets hung up on angle cuts. So, before I start an angle cut, I reach back with my free hand, grab the guard handle, and ease it up.
Sometimes my Makita guard gets hung up on angle cuts, so I pull the guard up at a start of cut to get it out of the way.
I hold it there with my thumb and my free hand on the pommel. I keep it lifted until I’m all the way into the piece, then let it drop down.
This is obviously kind of a tricky move, and comes with some danger because it causes you to have a weird grip. But sometimes, it’s easier to do this than force the guard up, which can twist the saw off track.
If you do it, don’t grab it when the saw is active—do it before you start. DON'T PUT YOUR HAND NEAR THE SPINNING BLADE! And again, not every saw does it as badly. This is a good reason to experiment with your saw on test pieces, so you know it’s tendencies.
And finally, as I’ve said in other videos, always know where your cord is! If you have a corded saw, as many people do, make sure it has plenty of slack, and that it’s in a good position. You don’t want it getting caught on something and hanging up your cut.
I’ll sometimes have to reach back carefully to pull it up around an obstruction. You may want to stop moving the saw to do this. But keep your eyes on the cut, and let the saw wind down completely if you have to.
All right, that’s covering a lot of bases. Again, these tips have to be coupled with practice and experience, but they might help you grasp the situation if you’re new.

In the end, you're responsible for your own safety!
Thank you for reading the article and watching the video! Sign up for our newsletter to get more advice, insights, stories and more!
Another Helpful THC Post
Here's a link to our article on how to change a circular saw blade.
If you have any questions, or if you have a suggestion for a subject of a future blog post, please go to our Contact page. Thanks!!
ACCESS MY FREE GUIDE:
The Ultimate Carpentry Checklist
and Glossary!
- Comprehensive Checklist: Quick reference to essential tools, materials, and concepts, color-coded for easy navigation.
- Detailed Visual Glossary: Visual aids to help you recognize and understand each tool and term.
- Expert Guidance: Curated insights from over two decades of carpentry experience.


